press-on nails
How to Store Press-On Nails: Keep Your Collection Organised and Ready to Use
The right storage keeps your press-on nails in perfect condition for multiple uses.
Most quality press-on nails can be worn 2 to 5 times — sometimes even more — as long as you remove them gently, clean off old adhesive, and store them properly between uses. That single set sitting in your drawer? It's not done yet.
The idea that press-ons are single-use is one of the biggest myths in nail care. Sure, cheaply made drugstore sets might not survive a second round. But well-crafted press-on nails, like the ones from Popink, are designed with durability in mind. The nail itself doesn't wear out after one application — the adhesive does. Replace or refresh the adhesive, and you're back in business.
Let's walk through exactly how to make that happen.
Before we get into the how, let's talk about the why.
Cost per wear drops dramatically. A set that costs €15 worn once is €15 per manicure. Worn four times? That's under €4 each. Suddenly, salon-quality nails are cheaper than a latte.
There's also the sustainability angle. Fewer sets thrown away means less waste. It's a small thing, but it adds up — especially if you're switching sets weekly for different looks.
And frankly, it's just satisfying. You invested in a set you love. Getting more life out of it feels right.
This is where most people go wrong. Yanking or prying nails off is the fastest way to destroy both the press-on and your natural nail.
Soak first, always. Fill a small bowl with warm water and add a few drops of cuticle oil or gentle soap. Soak your fingertips for 10–15 minutes. The warm water loosens the adhesive bond without force.
After soaking, gently wiggle each nail from side to side. It should slide off with minimal resistance. If it doesn't budge, soak for another 5 minutes. Patience here pays off — literally.
If you used nail glue rather than adhesive tabs, you may need a bit of acetone on a cotton pad, pressed against the edges to dissolve the bond. Just avoid soaking the entire press-on in acetone, as it can cloud or damage some finishes.
For a detailed step-by-step, check our full guide on how to remove press-on nails without damage.
Once the nails are off, you'll notice residue on the underside — leftover glue or adhesive tab bits. This needs to go before your next application.
For adhesive tab residue: Peel off as much as you can by hand. Then use a wooden cuticle stick to gently scrape away any remaining bits. A tiny amount of rubbing alcohol on a cotton pad dissolves stubborn residue without harming the nail.
For nail glue residue: This is a bit more stubborn. Soak a cotton pad in non-acetone nail polish remover and hold it against the underside of the press-on for 30 seconds. Then gently scrape with a cuticle stick. For thicker glue layers, a fine-grit nail file (180 grit or higher) can carefully buff away the excess — just don't file through the nail itself.
Pro tip: Clean your press-ons immediately after removal. Dried-on adhesive is much harder to deal with the next day.
Not every nail in a set will survive equally. Before storing, give each one a quick once-over:
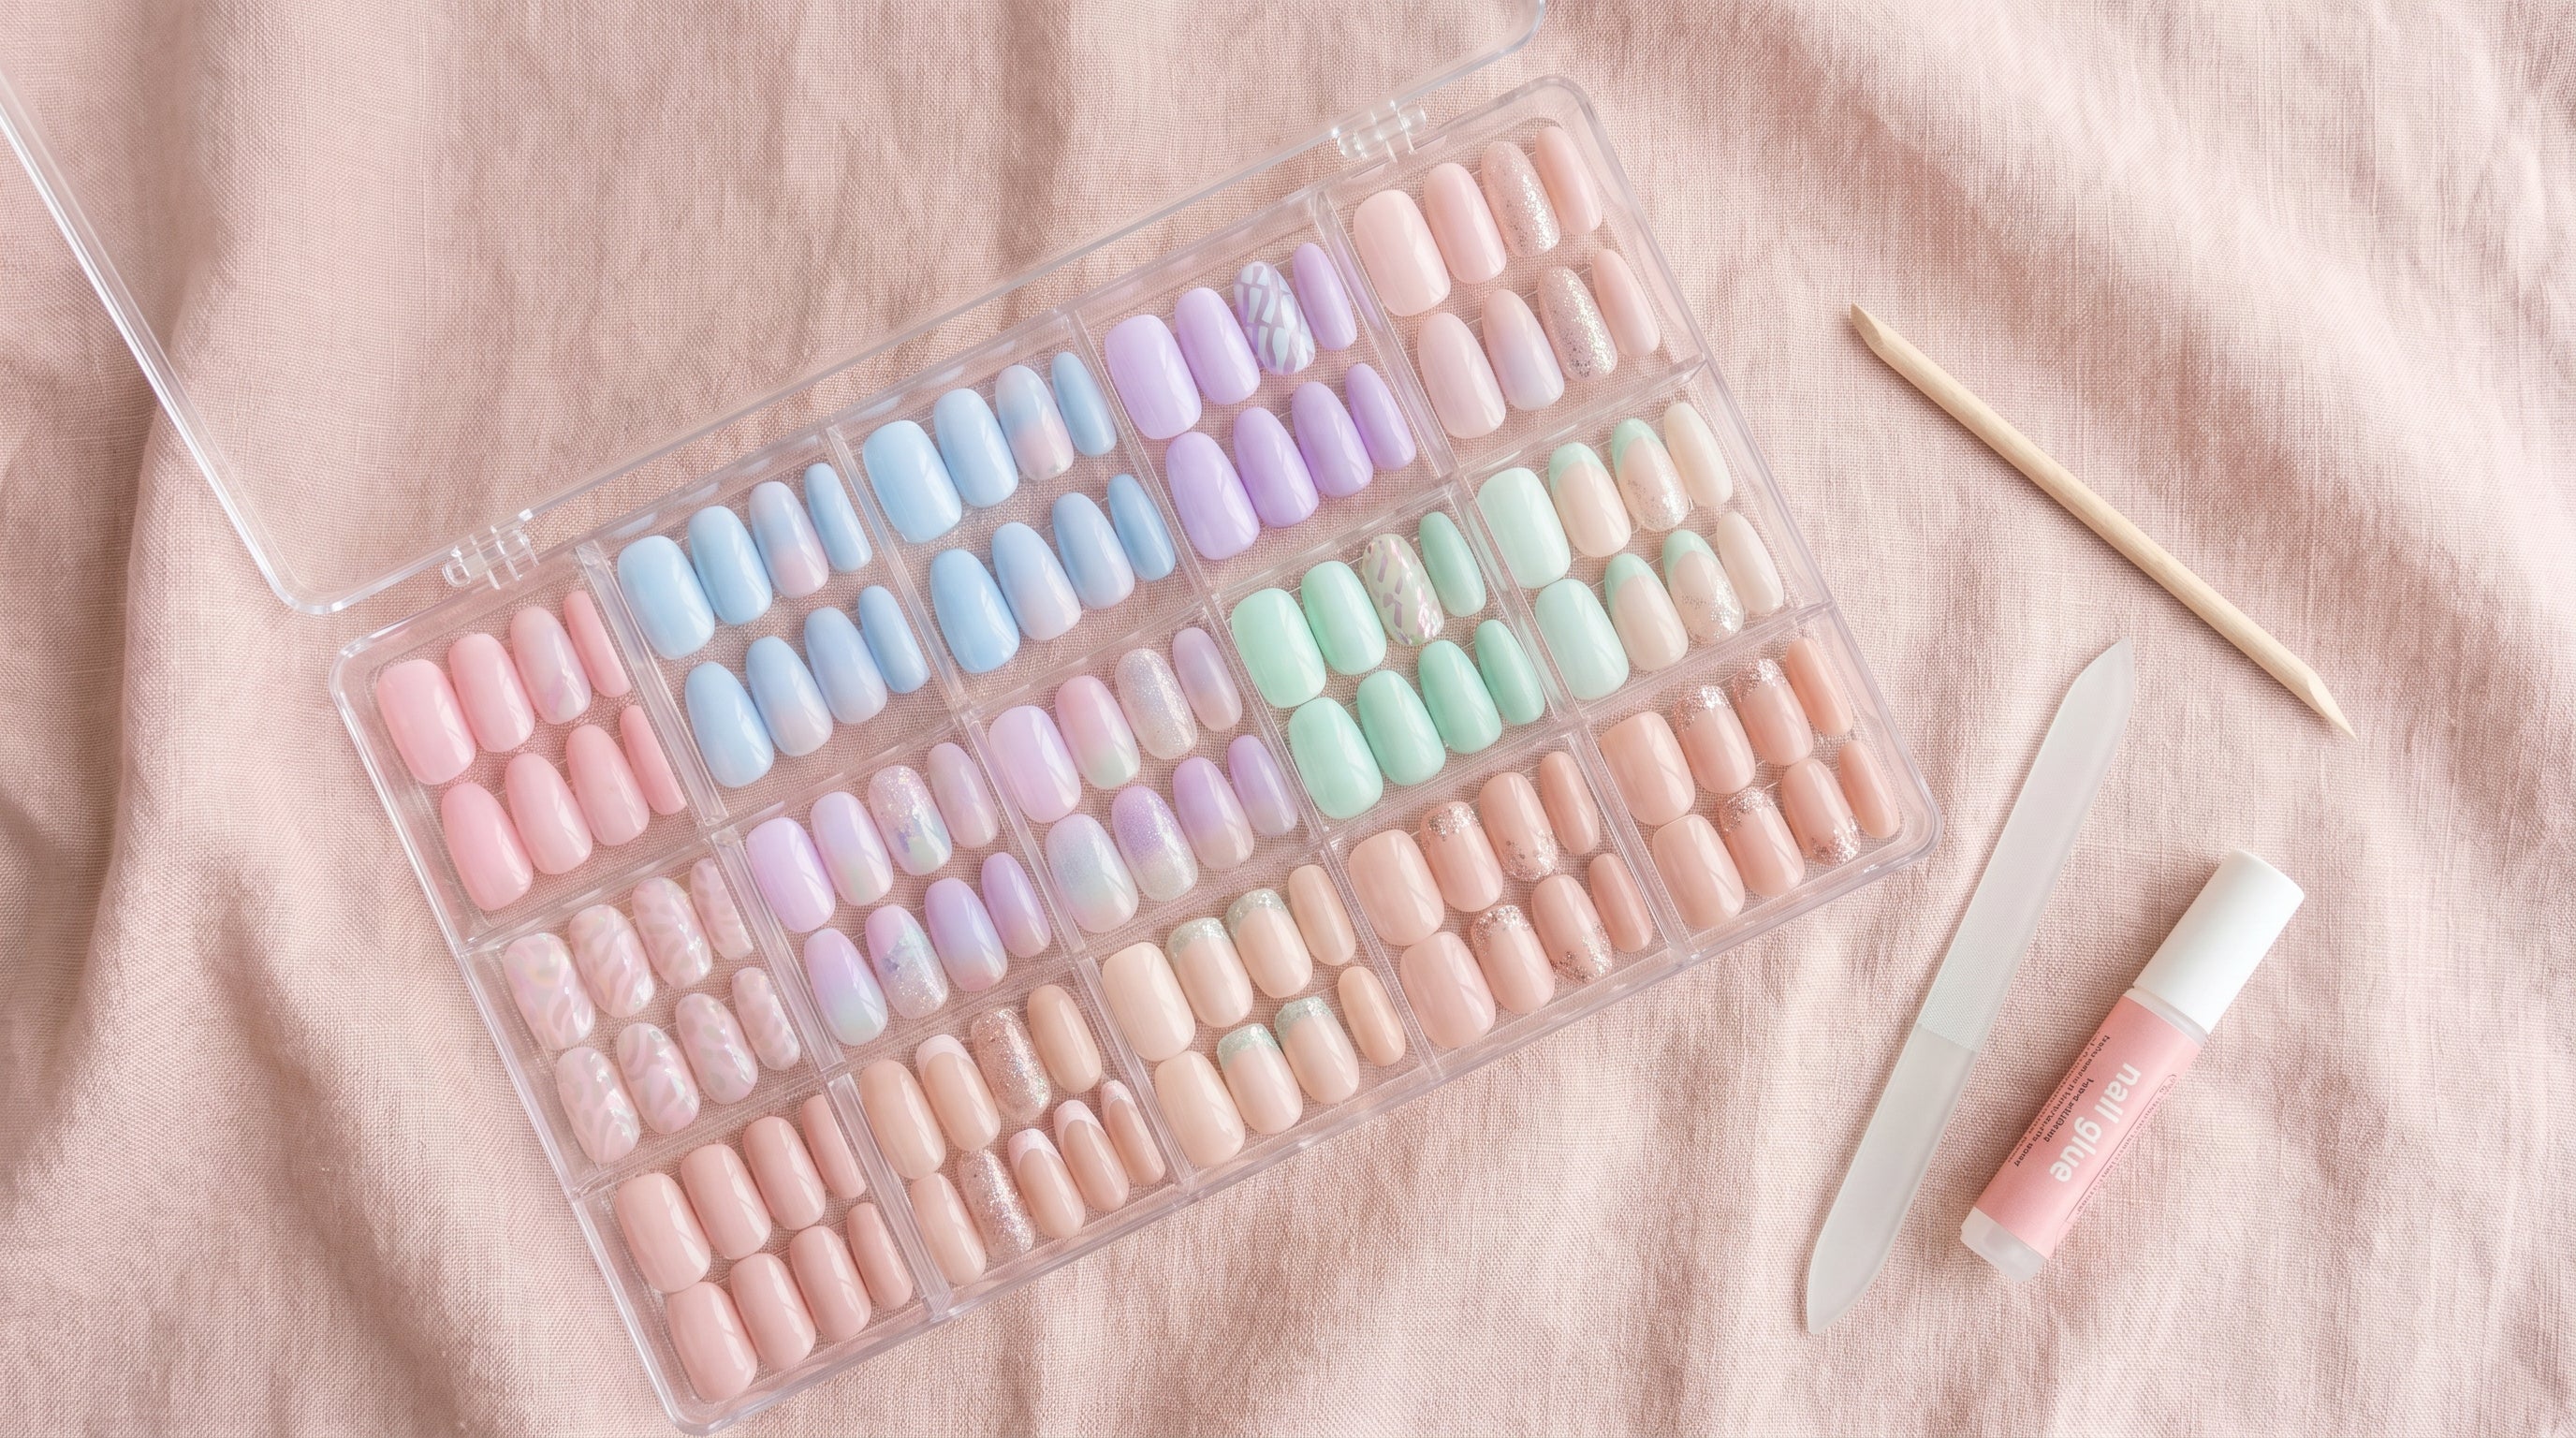
Storage is the secret weapon for reusable press-ons. Tossing them loose in a makeup bag is a guaranteed way to lose or damage them.
Here's what works:
This matters more than you think.
Adhesive tabs are the reuse champion. They peel off cleanly, don't leave much residue, and make removal a breeze. The trade-off? Slightly shorter wear time per application (typically 3–7 days vs. 1–2 weeks with glue).
Nail glue gives the strongest bond but makes reuse harder. The removal process is more involved, and there's a higher chance of damaging the press-on during cleanup. Glue also tends to leave a thicker residue layer.
Our recommendation: If you plan to reuse your set, go with adhesive tabs. The per-application wear time is shorter, but you'll get more total wears out of the set. For one-off events where longevity is priority, glue makes sense — just accept that reuse is less likely.
For tips on maximizing wear time regardless of adhesive type, see our guide on how to make press-on nails last longer.
It depends on the nail quality, your adhesive choice, and how careful you are during removal. Here's a realistic breakdown:
| Factor | Fewer Reuses (1–2) | More Reuses (3–5+) |
|---|---|---|
| Adhesive | Nail glue | Adhesive tabs |
| Removal method | Prying or forcing | Warm water soak |
| Nail quality | Thin, flexible plastic | Thick, durable material |
| Cleaning | Skipped or rushed | Thorough after each use |
| Storage | Loose in a bag | Original tray or organizer |
High-quality press-ons with adhesive tabs, careful removal, and proper storage can realistically last 4–5 wears. Some Popink customers report even more, especially with simpler designs that don't have delicate embellishments.
Hand-painted designs, glitter, rhinestones, and 3D elements add beauty — and complexity when it comes to reuse.
Flat designs (prints, painted art, chrome finishes) hold up well through multiple wears. The design is protected under a top coat, so it ages gracefully.
3D elements (rhinestones, charms, raised details) are more fragile. Stones can loosen over time, and raised elements are prone to catching on things. You can extend their life with a thin layer of clear nail glue over embellishments after each wear to reinforce them.
Glitter and foil nails tend to be surprisingly durable since the texture is sealed under coating. These are often great candidates for reuse.
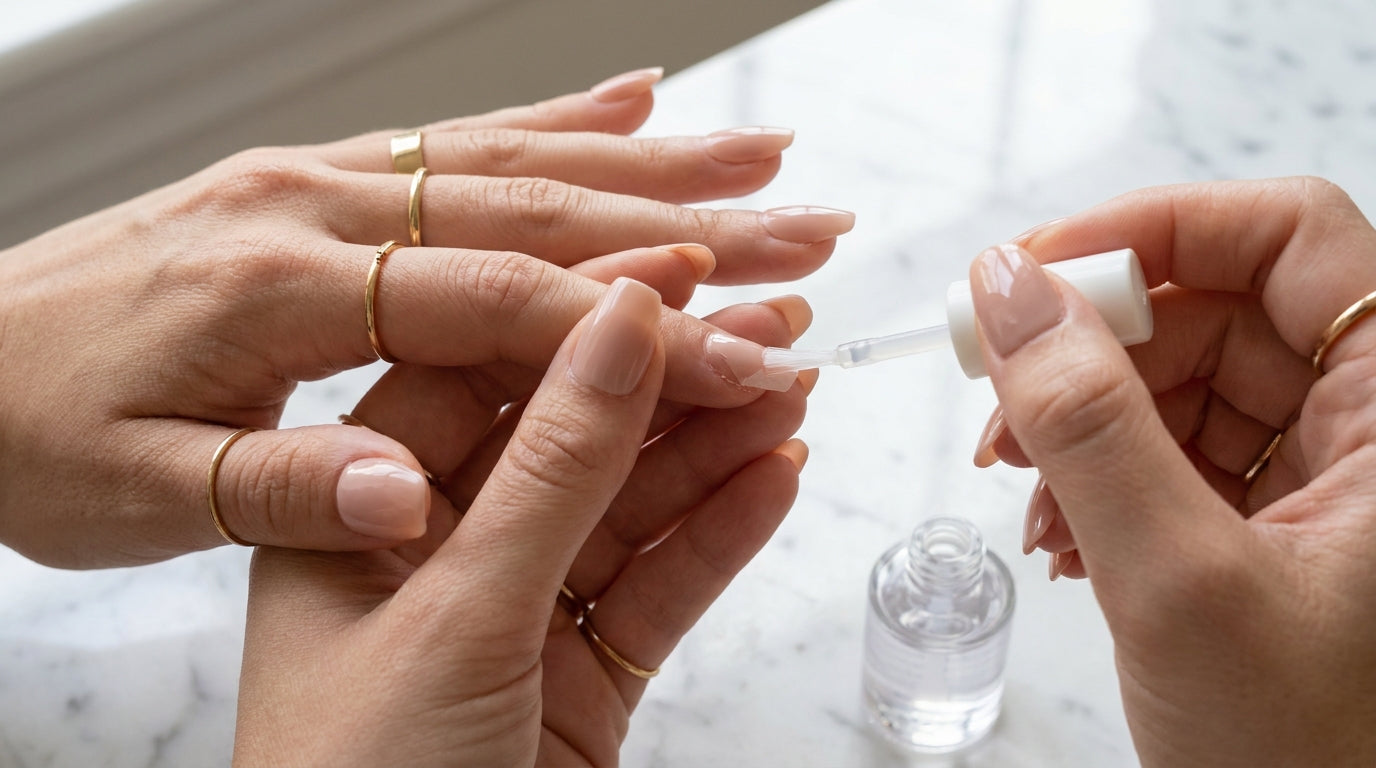
Each time you reapply, treat it like a fresh application. Your natural nails need prep too:
1. Push back cuticles gently with a cuticle stick.
2. Lightly buff the nail surface — this gives adhesive something to grip.
3. Clean with alcohol or the prep pad from your kit. Oil is the enemy of adhesion.
4. Apply a new adhesive tab or fresh glue. Never try to reuse old adhesive — it won't hold.
Proper prep is what separates a reapplication that lasts 5 days from one that pops off during dinner. For detailed sizing and application tips, our guide on how to size press-on nails covers everything.
Press-ons aren't immortal. Here are the signs it's time to let go:
Every Popink set is made to be worn, loved, and worn again. With a little care between applications, one set can carry you through weeks of gorgeous nails — different outfit, same stunning hands.
Browse the Popink collection and pick your next reusable favourite. Your nails (and your wallet) will thank you.
With proper removal, cleaning, and storage, most quality press-on nails can be reused 2 to 5 times. Using adhesive tabs instead of nail glue typically allows for more reuses since removal is gentler on the press-on.
Adhesive tabs are the better choice for reuse. They come off cleanly and leave minimal residue, making it easy to prep the nail for next time. Nail glue bonds stronger but is harder to remove without damaging the press-on.
Yes, but flat designs (prints, chrome, glitter) hold up much better than 3D embellishments. Rhinestones and charms may loosen over wears. You can reinforce them with a thin layer of clear nail glue between uses.
Store them in their original packaging or a small compartment box, keeping each nail matched to its size. Keep the container in a cool, dry place away from sunlight to prevent warping or colour fading.
Quality press-ons maintain their curve through several uses. However, thin or low-quality nails can flatten or warp over time, especially if exposed to heat. If a nail no longer fits flush against your natural nail, it's time to retire it.
The right storage keeps your press-on nails in perfect condition for multiple uses.
Clean girl nails are one of the biggest nail trends right now — and press-ons make them surprisingly easy to pull off.
A broken press-on nail is easier to fix than you think — the right approach has you sorted in minutes.